I originally planned to finish this project before Brandt’s second birthday. Then I was going to finish by Gwendolyn’s due date. (I did at least get the ottoman done before she was born.) Then I was going to finish before the new school year started. Now it’s October, and at last I have upholstered/slipcovered my chair!
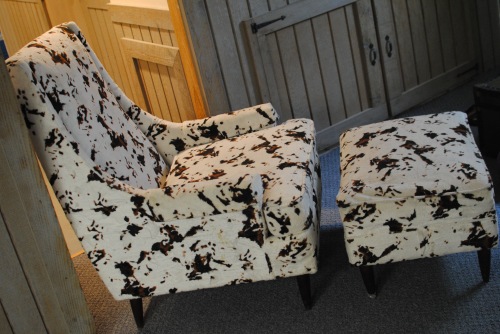
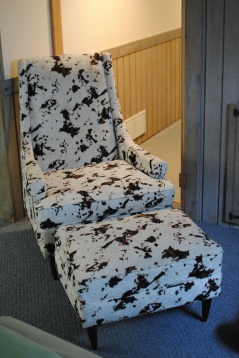
BEFORE:
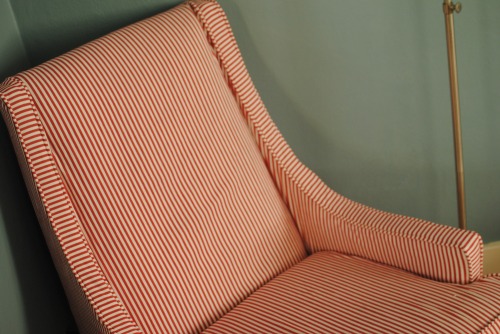
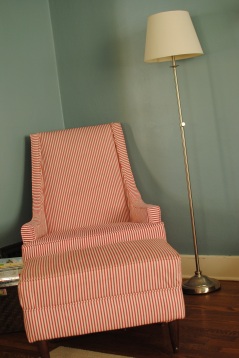
AFTER:
I bought the chair and ottoman for $12 at a garage sale a year ago. Looking past the furry cow print fabric, I liked the lines of the chair and the style of the legs. (If I can indulge in nostalgia, I also liked the style of legs – pudgy baby ankles – on that sweet little boy.)
The chair lived on the porch for a while as I searched for the right fabric to recover it. I estimated that I needed about 7 yards. I wanted something with red in it and with a pattern that had some graphic punch. I also wanted a durable fabric priced such that it wouldn’t turn my $12 chair into a $200 chair. After looking at fabric stores, local furniture outlets, and online, I finally found a red-and-white striped canvas at IKEA. At $5ish per yard (clearanced at the time), the price was right. I bought 8 yards just to be safe.
I started with the ottoman, since its boxy shape made it more straightforward. Because of some structural damage – a collapsed corner, a loose spring, and a split board – I definitely needed to take the old upholstery off to repair the innards (rather than just slipcovering it). I wanted to use the original upholstery as a pattern for my new cover, so I carefully pried all the staples off to remove the fabric without cutting it. This part was tedious, tedious, tedious.
When I finally had it all apart, I could see exactly what supplies I needed and how to reassemble things. I reattached the spring, repaired and braced the broken board (actually, my dad and Aaron did that part), and replaced the dustcover, foam cushion, and batting. Then I used the old fabric as a pattern and guide to sew my red-and-white striped material into a new cover and staple it onto the ottoman.
The trickiest part of the ottoman project was the piping (or welt cord). At first, I thought about skipping the piping, figuring it was just a decorative detail. But as I read about upholstery, I learned that piping actually strengthens seams, which is important on furniture that will get a lot of wear and tear. So I went for it. This tutorial was very helpful. But even so, it took a couple tries before I got the technique right, and my results are far from perfect. (Note: that tutorial says you need a welt cord foot for your sewing machine, but I read elsewhere that a zipper foot works, too, so that’s what I used.)
So I finished the ottoman, had a baby, and then a few months later began to tackle the chair. I originally wanted to reupholster the chair completely, but the process of taking the old fabric off the ottoman was enough of a chore to put me off repeating the process on a bigger scale. I opted to slipcover the chair instead.
First, I made a new cover for the cushion. Since the old cover was removable, I took it off and used it to make a pattern. For guidance, I referred to the same tutorial that I used for the ottoman. By now, piping was old hat, but this time I had to learn how to sew a zipper. The cushion foam was still in good shape, so I stuffed it into the new cushion cover once I had it done.
Now things got more complicated. Around the time I bought the chair, I saw a slipcover tutorial on a blog called Pink and Polka Dot (the post I read is no longer available, but it seems she’s made the content into an e-book). The basic gist is that you drape your fabric – wrong-side-out – over the piece of furniture, trace, add seam allowances, cut, put pieces (wrong-side-out still) back on the chair, pin, and finally sew. (You can get an idea of the process here.)
I spent a long time studying my chair to figure out how to section it out into fabric pieces. Because I was slipcovering rather than upholstering, I couldn’t always use the existing fabric as a guide; for instance, some seams that worked for fabric stapled into place just didn’t make sense for a fitted slipcover. After I cut and pinned my fabric, I had to determine where piping needed to be sandwiched between seams. Finally, I had to deduce the order of assembly, so that seams would match up and tuck in appropriately.
Sewing the slipcover became a process of trial and error. I’d sew an arm, then put it on the chair (right-side out this time) to check the fit. Sometimes I had to take out seams and start again. Sometimes I had to cut new fabric pieces, if my original cut was too short or too narrow. It got easier as I went, since the process on one side could be replicated for the other (provided I remembered what I had done!). Eventually, I prevailed!
My new chair has plenty of imperfections, but it’s good enough for me. In fact, I love it. It’s already become our favorite reading chair. It’s so satisfying to enjoy something I made with novice sewing skills (really! I’ve only had sewing machine since January), a smidgen of geometry, and lots of problem-solving.


My head hurts now, but I love your chair and ottoman!:)
Fantastic job!
Well done! What a huge accomplishment on its own, not to mention with a baby and toddler to juggle! It looks gorgeous. You, my friend, are a thrifty and stylish DIY rockstar. 🙂